#Quick start
A quick start guide to build and a release your first project.
Login
The platform is accessible to the URL links:
- For customers in European area: https://ue.prod.app.spixii.ai/cxd/web/
- For customers in US: https://us.prod.app.spixii.ai/cxd/web/
Create your account
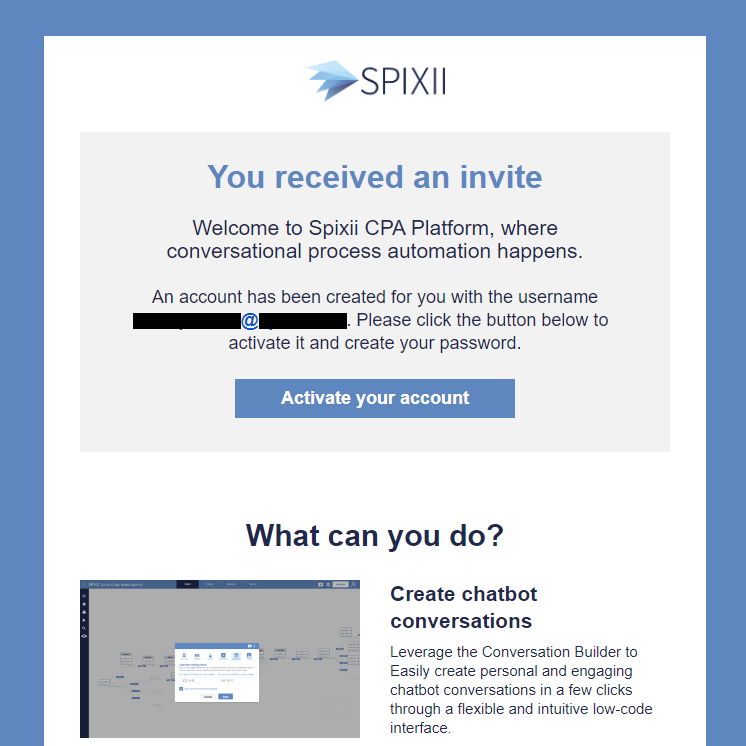
In case of first access, you should have received an invitation email to activate your account.
 By clicking on the
 Activate my account button you will be prompted to a page where you can set your password and start using the platform.
⚠️ Important note If you didn't received an invitation email, please contact us at info@spixii.com.
Login with username and password
You can login into the platform using username and password.
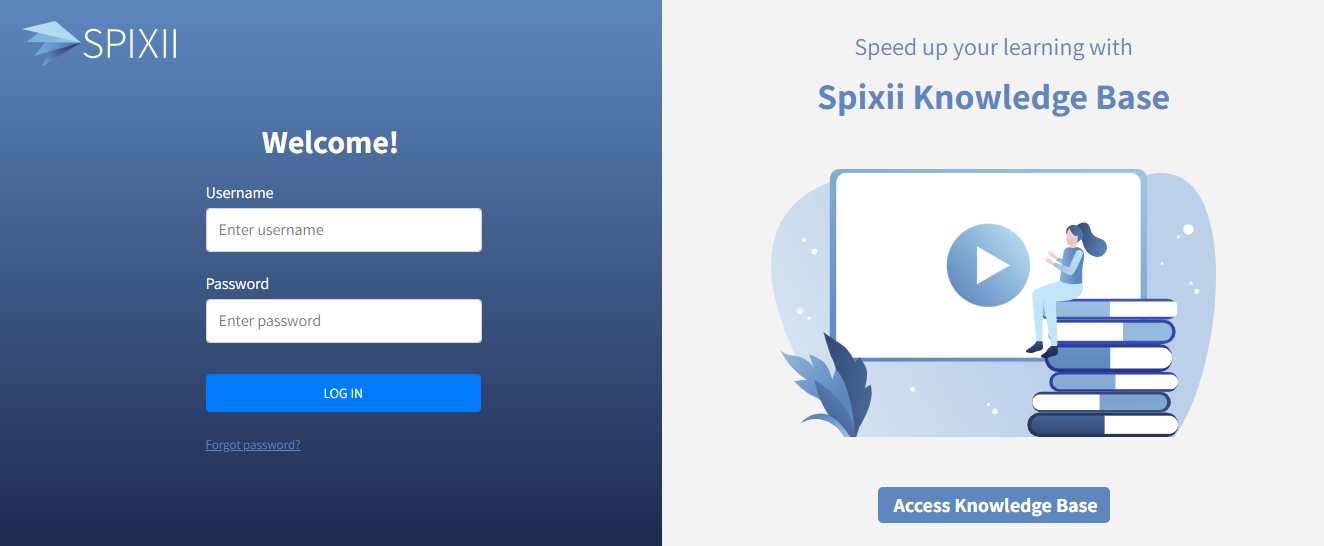 If correct, you will be prompted to your Workspace.
In case if you can't remember your password, you can use the option Forgot password?.
The platform will send you by email a 24-hours expiring link to your registered email address to reset your password.
Create your first project
Create your first project by clicking on Create project on the top-right of the workspace.
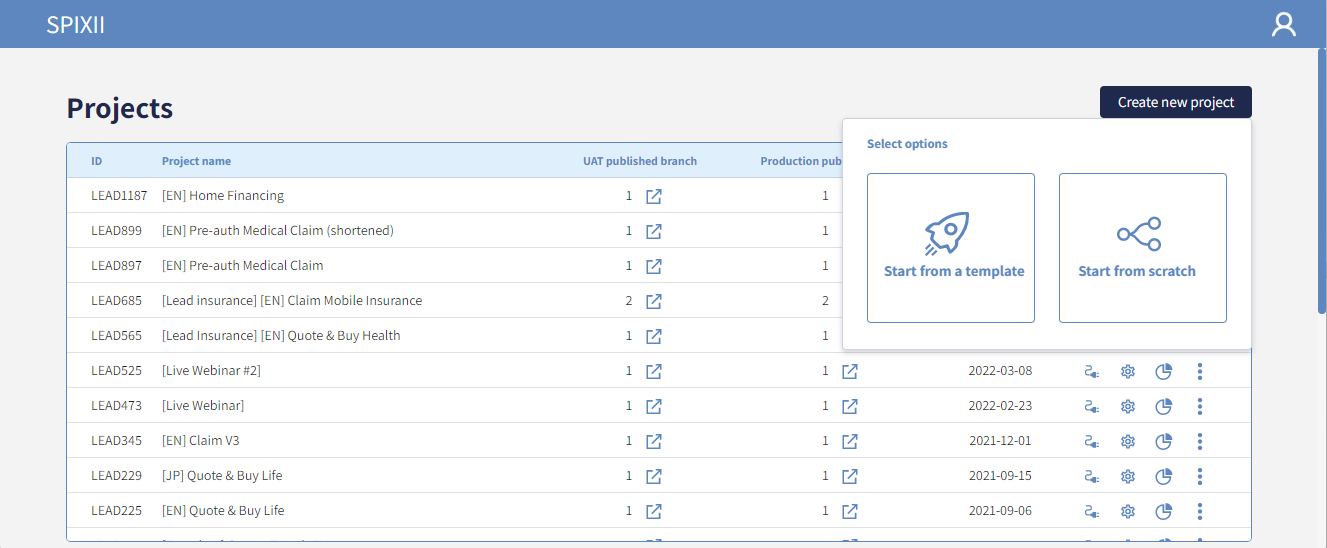
Every project is defined by the following information:
-
ID, a unique code that identifies the project Whenever you require the Spixii team to help you, please refer to this ID to help them to identify your project.
-
Name, a textual title of the process You can assign a project name that helps you and your colleagues to identify the process that you are building (for example,
Quote&Buy, English, Motor Insurance).
The project name will be automatically assigned if you create a project from a template: you can always change the project name by clicking on the three vertical dots and choosing the optionRename project. -
UAT and Production published branch They represent the version of the project currently available in UAT and in Prod. They may differ when improvements and enhancements are under validation before going live in Production. The link icons allows the CPA user to open in a different page the chatbots in UAT and Production.
-
The date of the project creation
-
A list of Actions that can be executed on the project, like connecting the chatbot frontend solution, assign global variables, rename or delete the project and access to the Reporting data dashboard.
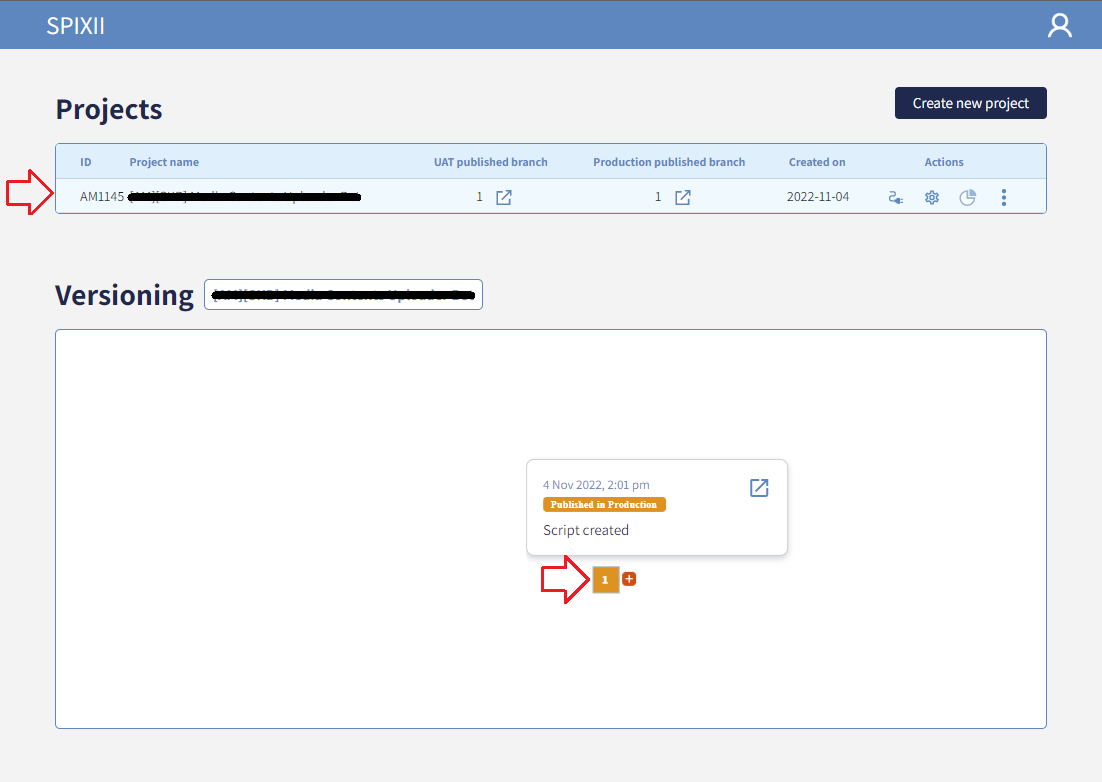
Access to your first project
Click on your new project to open the Versioning tab, then select the only available branch, with id 1 to open the Build tab and start with your conversational process.
Build the conversation
The Build tab is one of the most complex and versatile component of the platform: here you will be able to fully customize all the configuration of your conversational process. More information and details on this module can be found on the Build chapter.
Draft the conversation
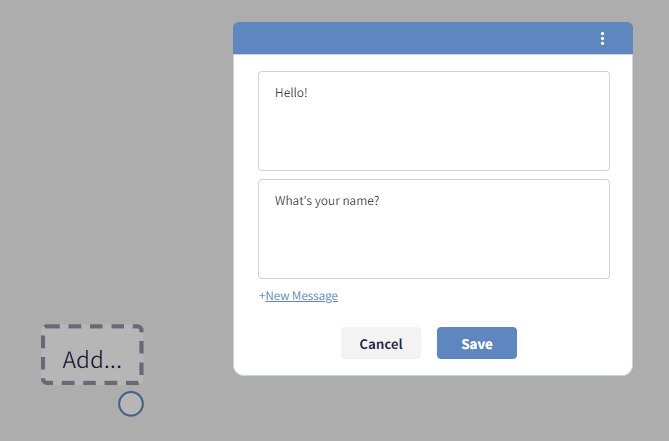
Assign some text to a node
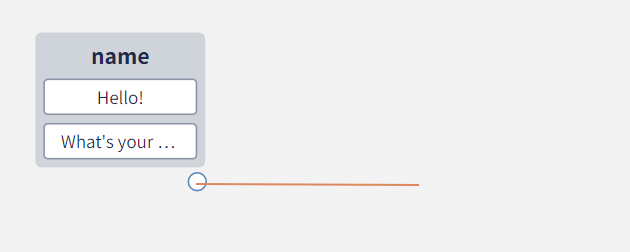
Once landed on the Build tab, the first message of the conversation can be easily created by clicking on the Add box in the middle of the screen.
 ⚠️ Important note
Assign text otherwise the chatbot won't be able to respond.
⚠️ Important note
Assign text otherwise the chatbot won't be able to respond.
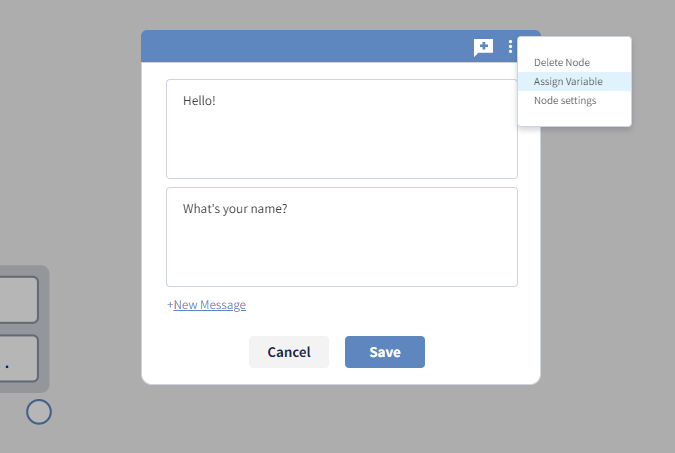
Assign a variable to a node
It's always recommended to assign a variable to most of the nodes: this semantical association allows the process to refer to the user's answer.
The variable can be assigned by clicking on the three dots on the top-right of the node box.
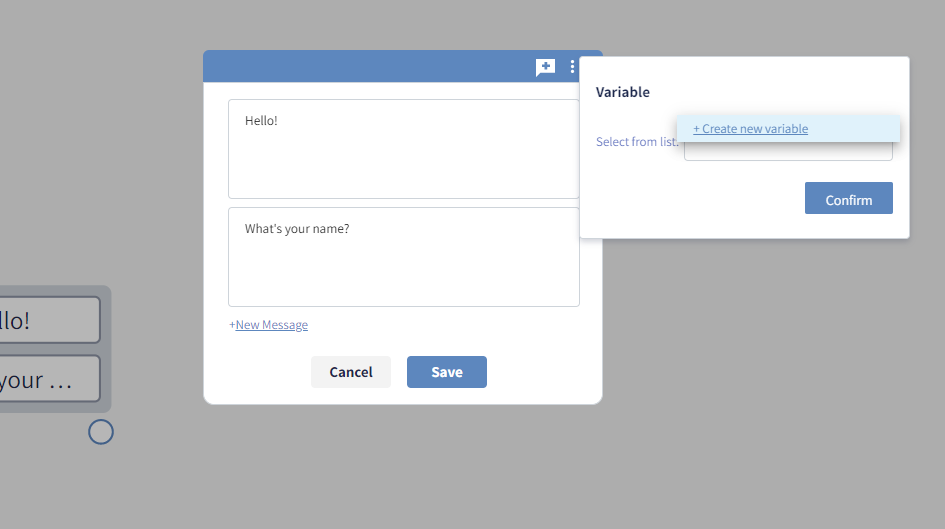
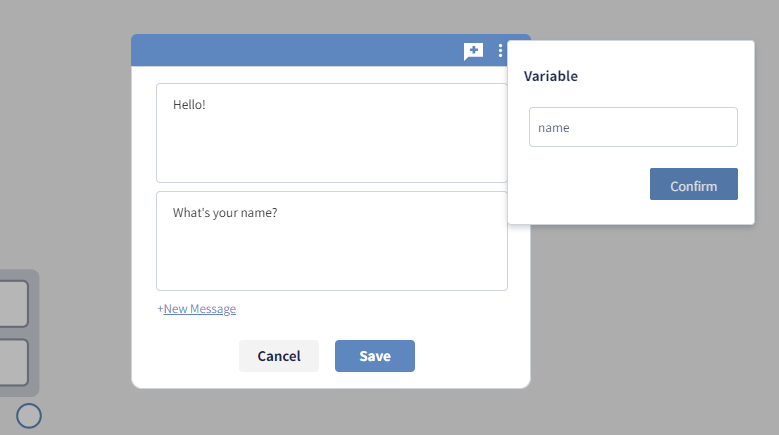 The variable
 name can be now referred into the entire process.
Create a user interaction
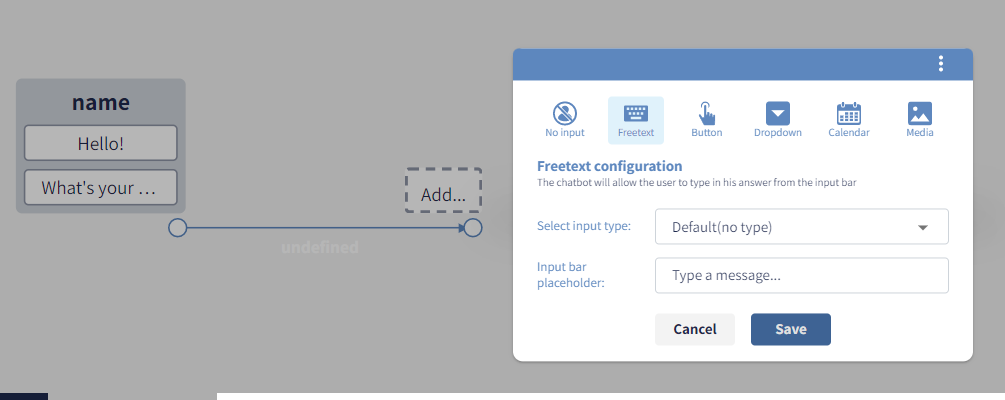
User's interactions can be easily configurated by dragging and dropping with the cursor from the source node to the white board.
 The user interactions are:
- No user interaction The process will move to the next node as no answer is expected by the user
- Free text A free text box is provided to the user. The caption, formatting and some inline validations such as numeric or email address inputs can be customised.
- Buttons
Buttons are very chat-friendly and make processes quite fluid.
A dedicated configuration panel to change the order and the layout of the buttons is available by clicking on the link
Open buttons details. - Dropdown list A key-value list saved into one of the variable listed can be displayed to the user, who can simply pickup an element from the list or leveraging the auto-complete by typing the first few digits to see the sub-set of elements that match with the pattern specified.
- Calendar A calendar UI will be displayed. The dates range can be specified.
- Media contents
A couple of interactions to submit or to cancel the submission of media contents.
The type of content (document, image, video, etc …), the maximum number and the upper-limit size of the files can be configured.
Use of a variable
Once create a free text user interaction, let's open the new node created by clikcing on the
Addbox and assign the following text:Nice to meet you, {{name}}!The reference to the variable name is done using the double curly brackets as describe in the Mustache Web format.
Test the conversation flow
The conversation flow can be tested in real-time by clicking on the
Test chatbotbutton on the top-right of the Build tab.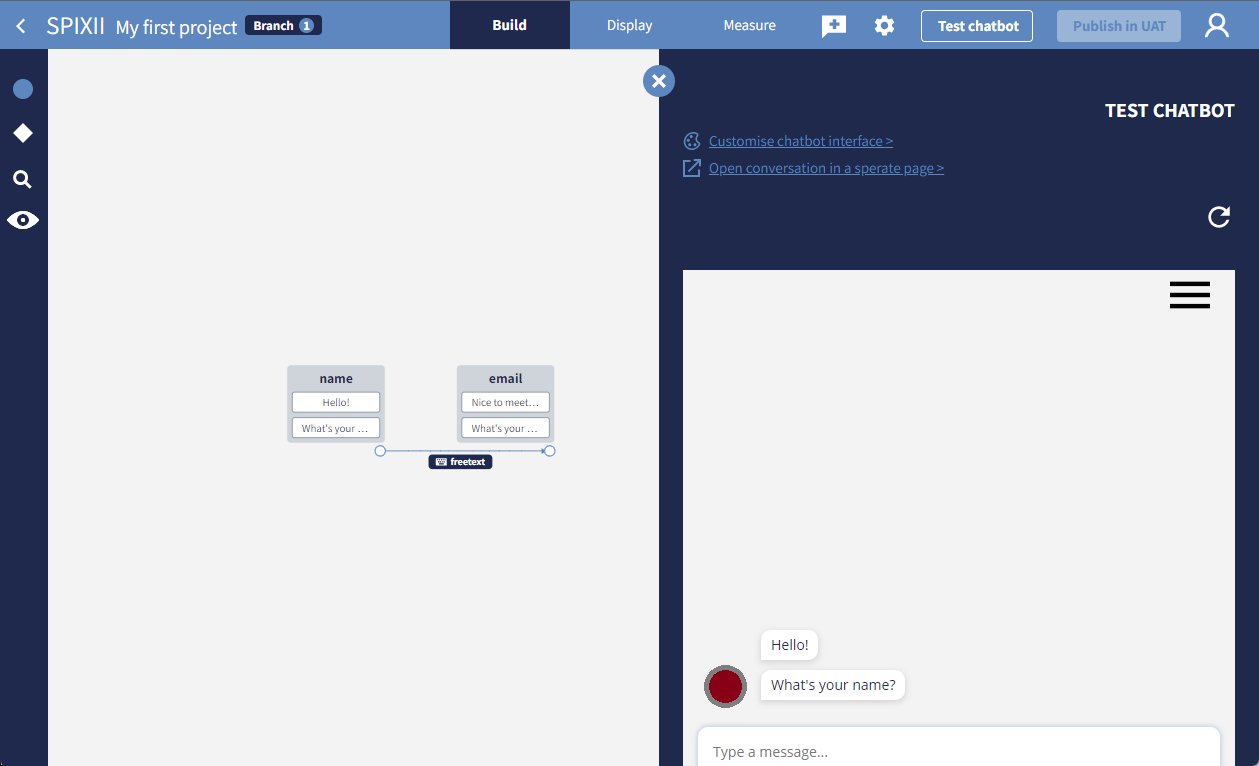
Customize the UI
Once created the messages, the user interactions and validated the flow of the process using the testing feature, let's go to the Display tab where the graphical layout of the solution can be customised. Let's select the
Default theme. Many elements can be customised, like the avatar, the font, the brand colour and more, as describe more in the Display tab chapter of this documentation.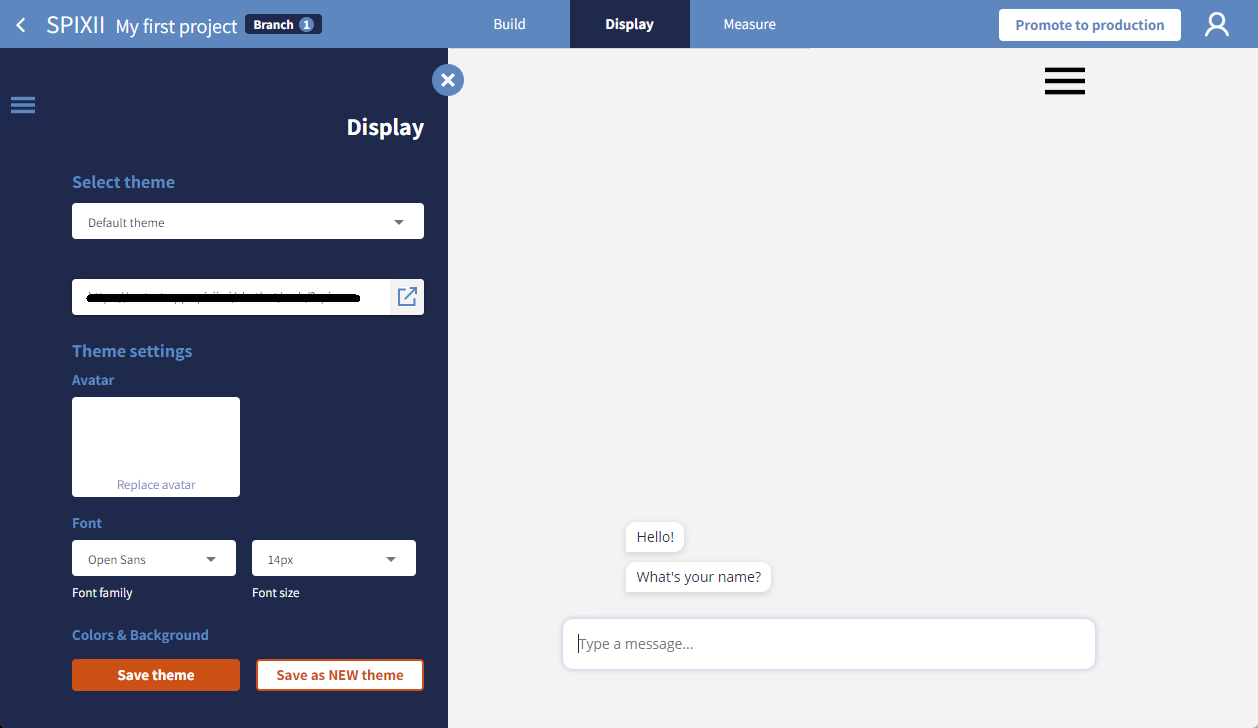 Once happy with the stylistic improvements, click
 Save themeto apply all the changes.
Release in Prod and plug on your website
The conversational flow of the process and graphical assets are ready. The solution can now released and integrated with our web site, mobile app or portal.
Select < to go back to the Workspace, then use the plug icon Connect chatbot of the process.
 The solution can be connected in
 UAT or in Production.
Connect UAT chatbot
If you want to connect the UAT process, then there is nothing to do but copy-and-paste the fragment of source code provided by the dialog box appearing by clicking Connect UAT chatbot.
There are two options of integration:
- The
JS Web Client, which installs a JavaScript bundle into your website. This is the recommended solution because it gives the best and most fluid loading and chatting experience to the end user. - Alternatively, a simple
iframeoption is also available, that can be simply copy and pasted into the HTML code of your webpage.Release and connect Production chatbot
Before connecting the Production chatbot with the two option mentioned above, the
JS Web Clientand theiframe, the entire solution must be released in Production. In order to release the version1of your project in Production, just click on theUpdate solutionbutton flagged by the exclamation mark.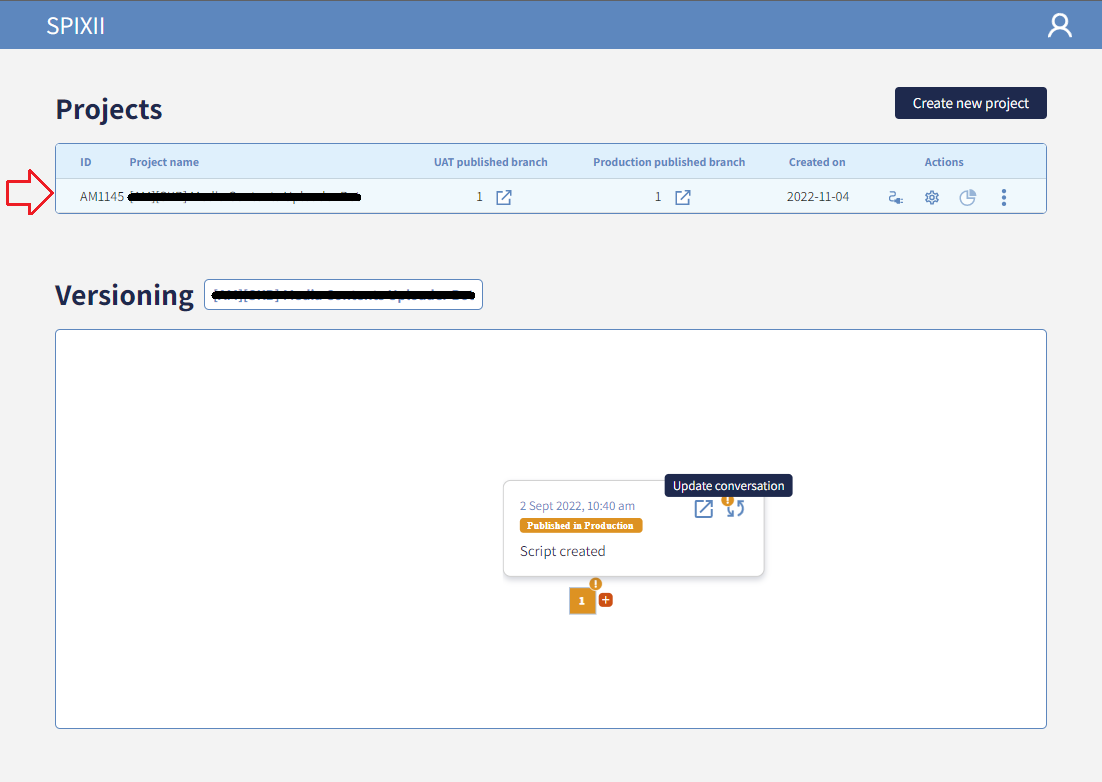 Once completed, the exclamation mark shall disappear: the solution in Production was successfully aligned with the one in UAT.
Now it can be used the
Once completed, the exclamation mark shall disappear: the solution in Production was successfully aligned with the one in UAT.
Now it can be used the Connect Production chatbottool from the project settings to integrate the solution with your webpage.