#Functional node
Understanding functional nodes
In the graph we can find two types of nodes:
- standard nodes represented with the symbol 🔵 containing textual messages
- functional nodes represented with the symbol 🔷, In the graph we have simple nodes, containing the messages fired by the chatbot and functional nodes.
Functional nodes set built-in logic rules, execute API calls to your core systems or any third parties API, query the database and associate a chatbot behaviour according to every function’s output. Functional nodes carry their logical execution in the background and transit the end-user from a standard node to another standard node. Therefore, functional nodes are not visible to the end-user chatting with the conversational UI.
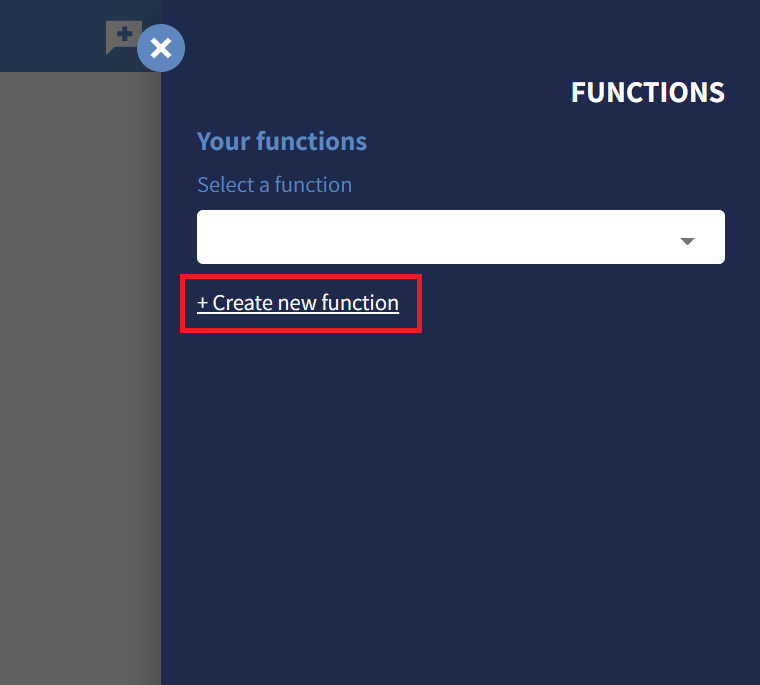
In order to create a functional node select the 🔷 icon from the controls toolbar at the left of the board and exactly as per simple nodes, click in any empty space in the board.

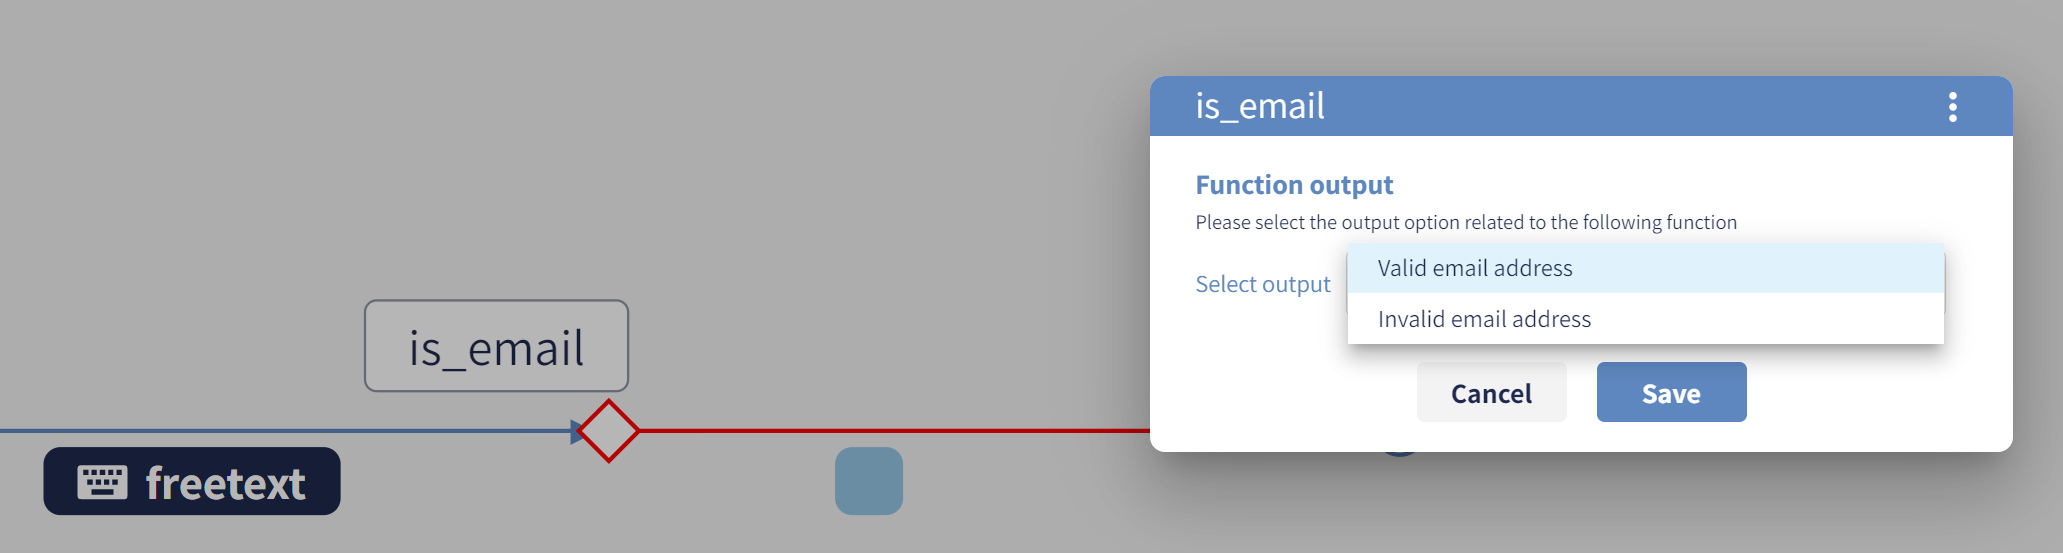
Every function has outputs represented through red edges. In a functional node, edges are predefined, therefore, when creating new ones the edge control panel will display a drop-down with the available options. For example, in the function below, we check an email address and are given valid and invalid outputs as options.
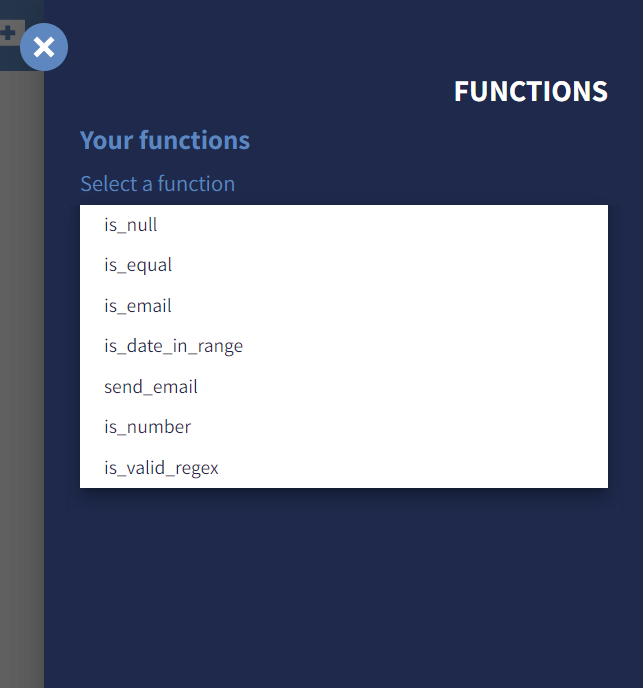
There are Standard Functions, which are provided directly by the CPA platform and ready to be integrated in any conversational process, and Custom Functions, with possibility to enter custom logic.
Standard Functions
Most of the Standard Functions are validation functions. As an example, the simplest scenario is a function with two outputs: valid and not valid. When the input from the user is not valid, you can create an out-coming edge pointing to an error message. When the input is valid, the conversation can continue as per the “golden path” to the following conversational node.
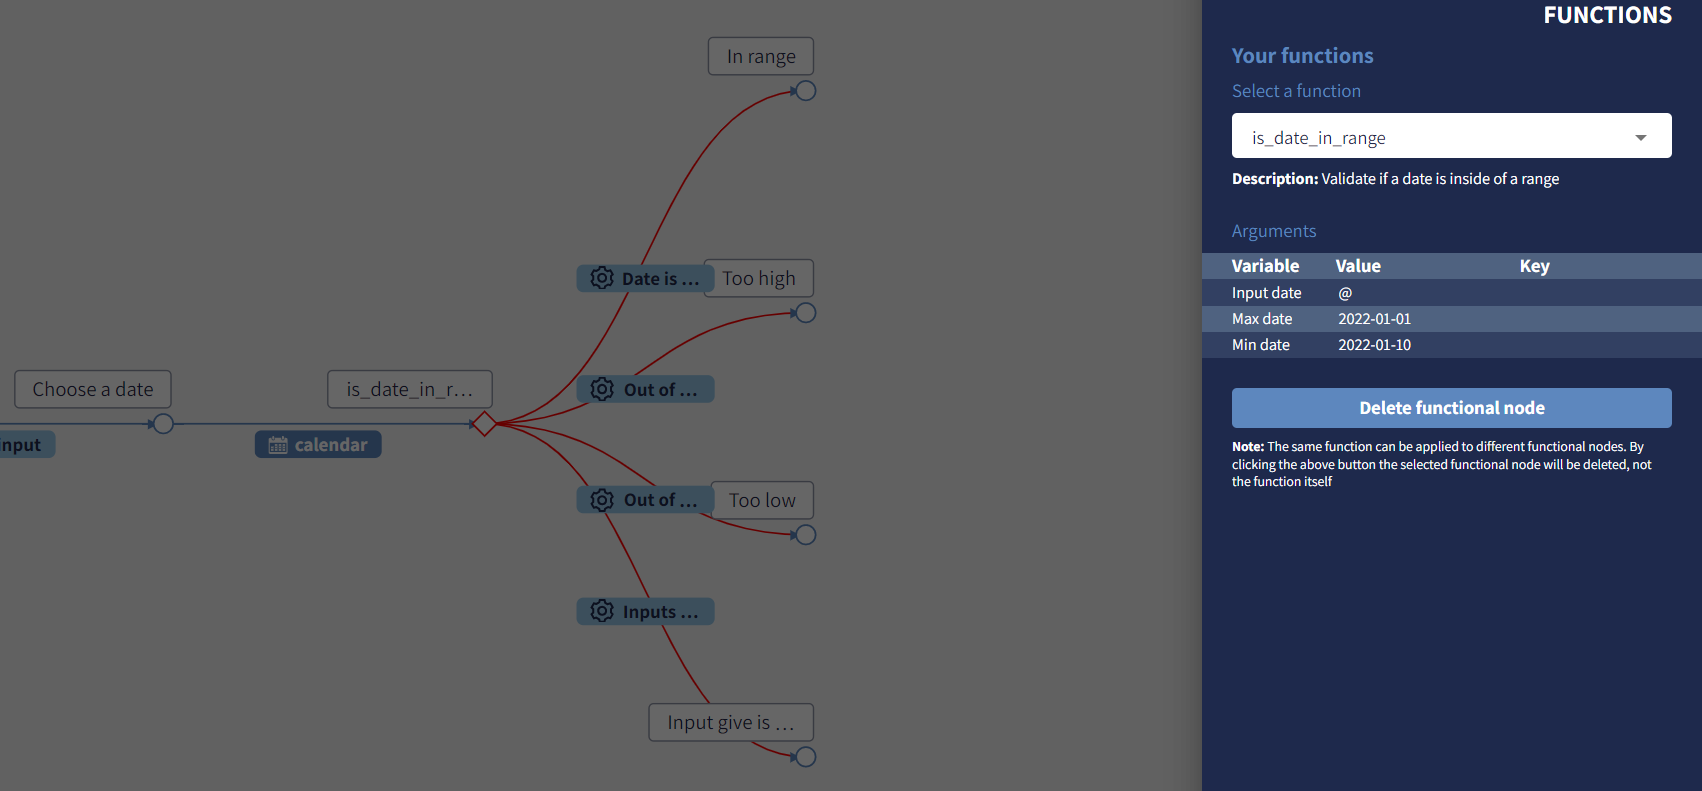
Function is_date_in_range
The function is_date_in_range checks whether the date selected by the user is inside or outside a desired range. As function outputs you have 4 scenarios: a date before the allowed range, a date after the allowed range, a date given doesn't have the format YYYY-MM-DD and the one within the allowed range. For each scenario, you can have a specific chatbot message or conversation flow.
The is_date_in_range function has 3 arguments:
Input date, the input data to be calculated (by default@, which is the last message given by the user)Max date, the higher limit of the range with formatYYYY-MM-DDMin date, the lower limit of the range with formatYYYY-MM-DD
Max date and Min date can be empty: the function simply won't validate the missing border.
In the following example, the conversation will display to the user the message "In range" if and only if the date picked up is between the 1st and the 10th of January 2022.
⚠️Important note:
It's a good practice implementing the right input validation from both the angles, the UI and the logic.
In the example above, the calendar edge can be customised the two limit dates Max Date and Min Date.
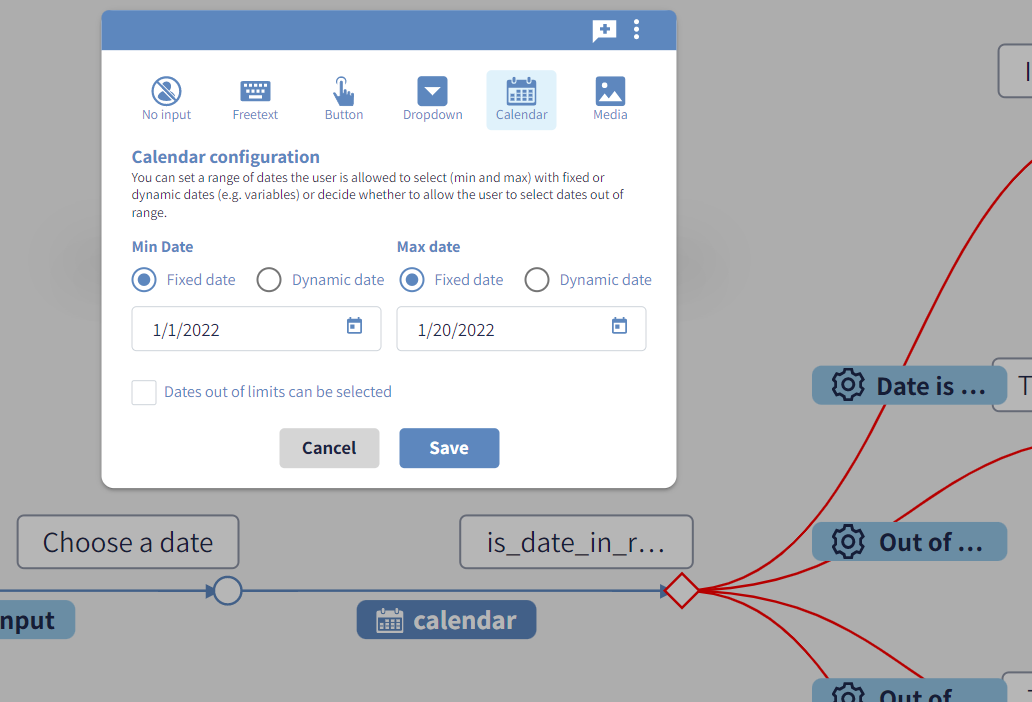
This customisation allows users to proceed with the conversation if and only if they pick-up a date between the 1st and the 10th of January 2022. However, it's worthy increasing the robustness of the process by concatenating the is_date_in_range function.
In particular, by selecting the checkbox Dates out of limits can be selected, the dates out of the range will be clickable: this is useful to give to the user an explanation of the date limits.
For example, in a claim notification process the date of the loss can't be in the future: the conversation designer may:
- assign to the
calendaredge the Max date to{{today}}and tick theDates out of limits can be selectedoption; - concatenate the
is_date_in_rangeoption withMax date = @today - create a node with text "Your loss can't be in the future" connected to the function output in case of date after the range given.
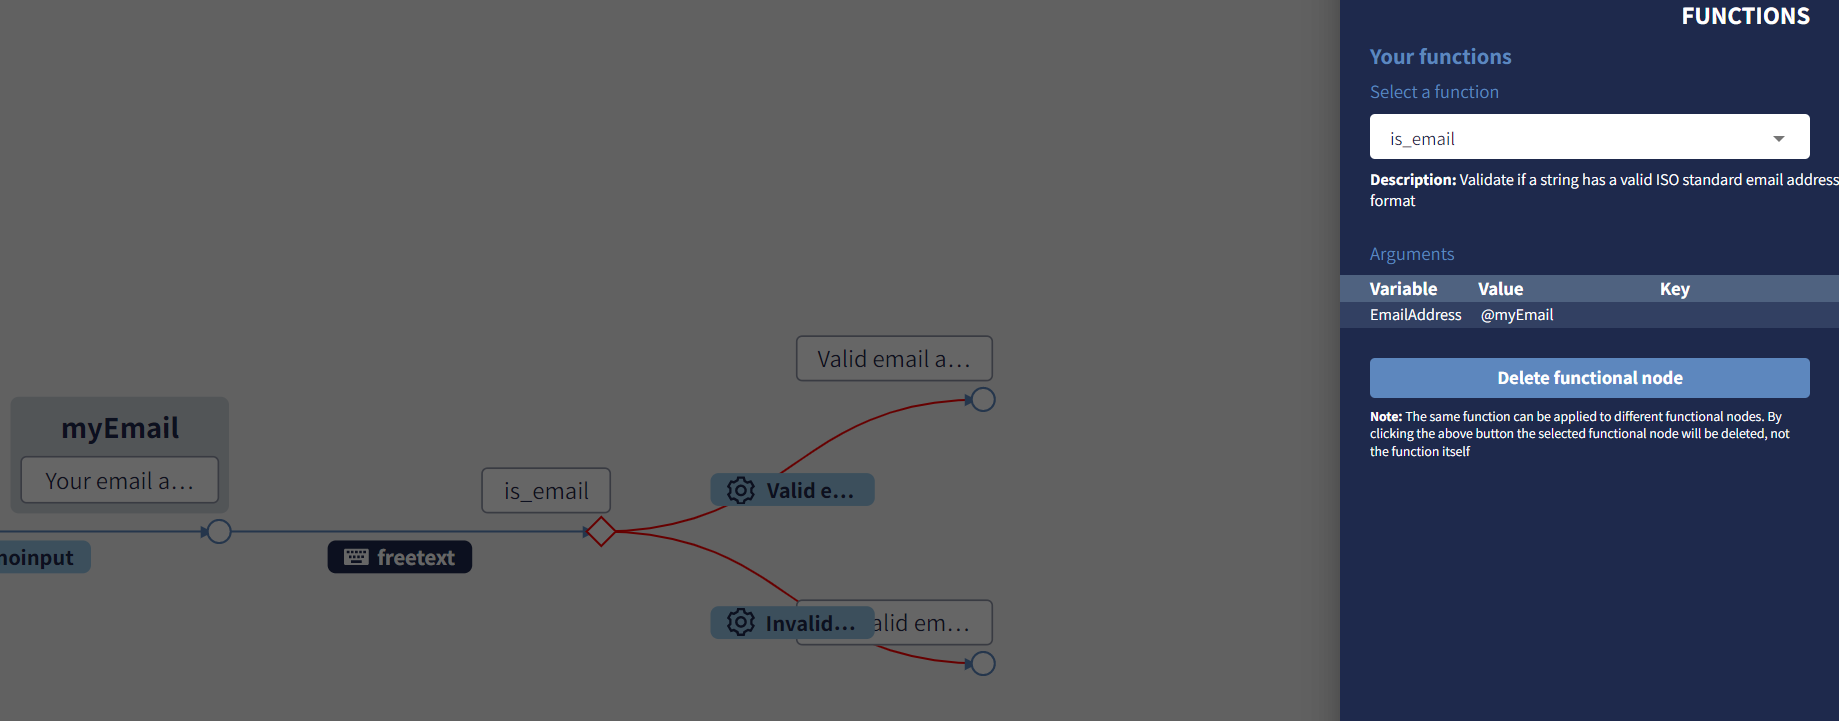
Function is_email
The function is_email checks if the email entered by the user is aligned with ISO RCF 822 standard email address format. As outputs we have valid and not valid. As outputs we have valid and not valid.
In the example below, the variable myEmail contains the text given by the user that has to be validated by the is_email function.
⚠️Important note:
It's a good practice implementing the right input validation from both the angles, the UI and the logic.
In the example above, the freetext edge can be customised with the Email input type.

This customisation allows users to proceed with the conversation if and only if they type a valid email address. However, it's worthy increasing the robustness of the process by concatenating the is_email function.
Function is_equal
The function is_equal verify if two variables are equal. As outputs we have valid and not valid.
This function takes 4 arguments:
FirstVariable, first value or variable to compareSecondVariable, second value or variable to comparecase_sensitive, comparison is case sensitive (Yby default)validate_key, compare also the variable keys (Nby default)
In the following example, the is_equal function is used to check if the date picked up by the user is today or not. In the first case, the process will display the message "Selected today", otherwise it will display "Selected a day different from today".
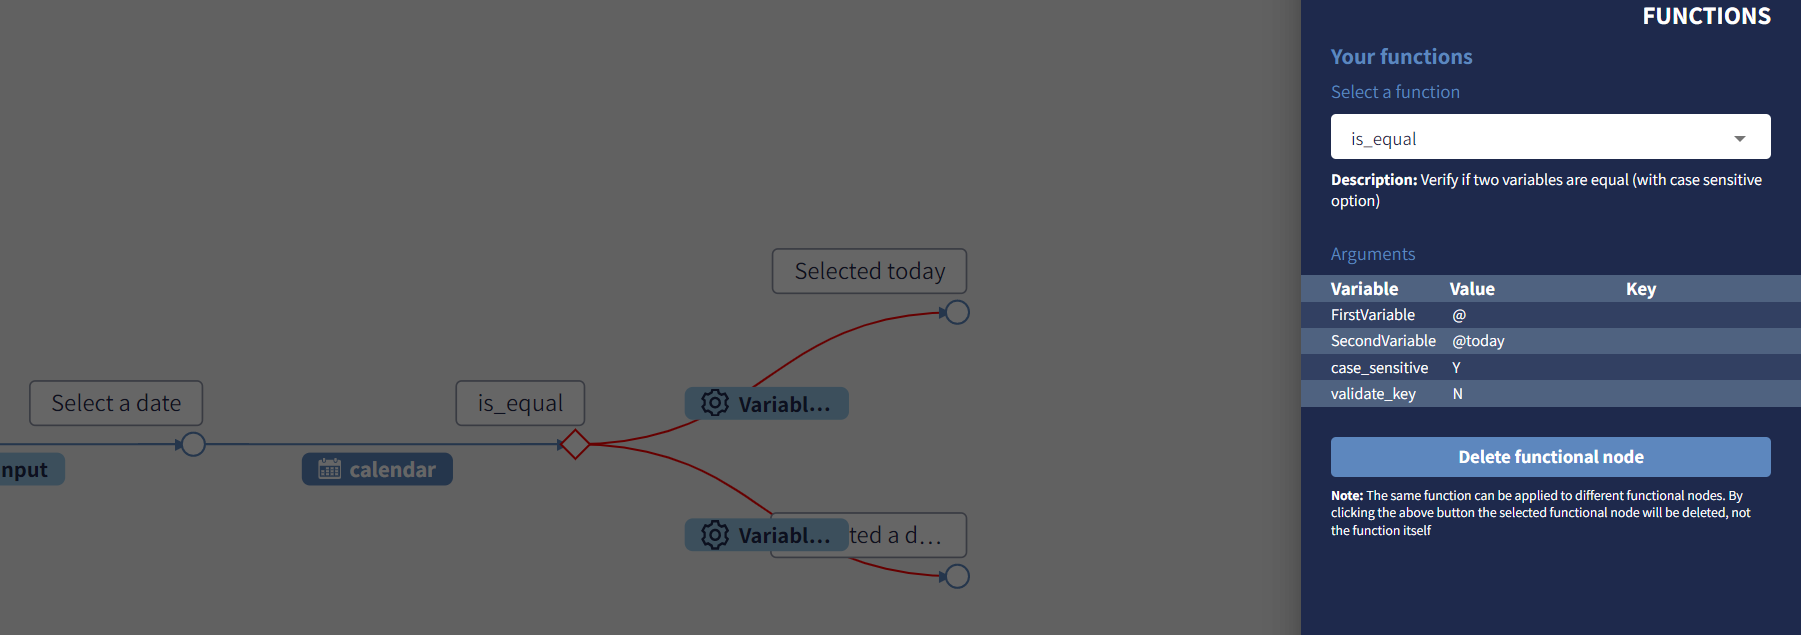
FirstVariable is set to @, which means that the function takes the value given at the previous question. SecondVariable is set to @today, which means that its value is give by the value of the variable with name today. The other parameters are untouched.
Function is_null
The function is_null checks if a variable is empty (not defined, defined as null or defined as an empty string). As outputs we have valid and not valid.
Function is_regex_valid
The function is_regex_valid, verify if a variable matches with a given regular expression. As outputs we have valid and not valid.
Regular expressions are useful to apply some static validation on a user input.
Let's assume in the following example that the policy Id format is 3 letters + a number of 5 digits. The regular expression ^[a-zA-Z]{3}\d{5}$ can validate immediately if a variable complies with the format.
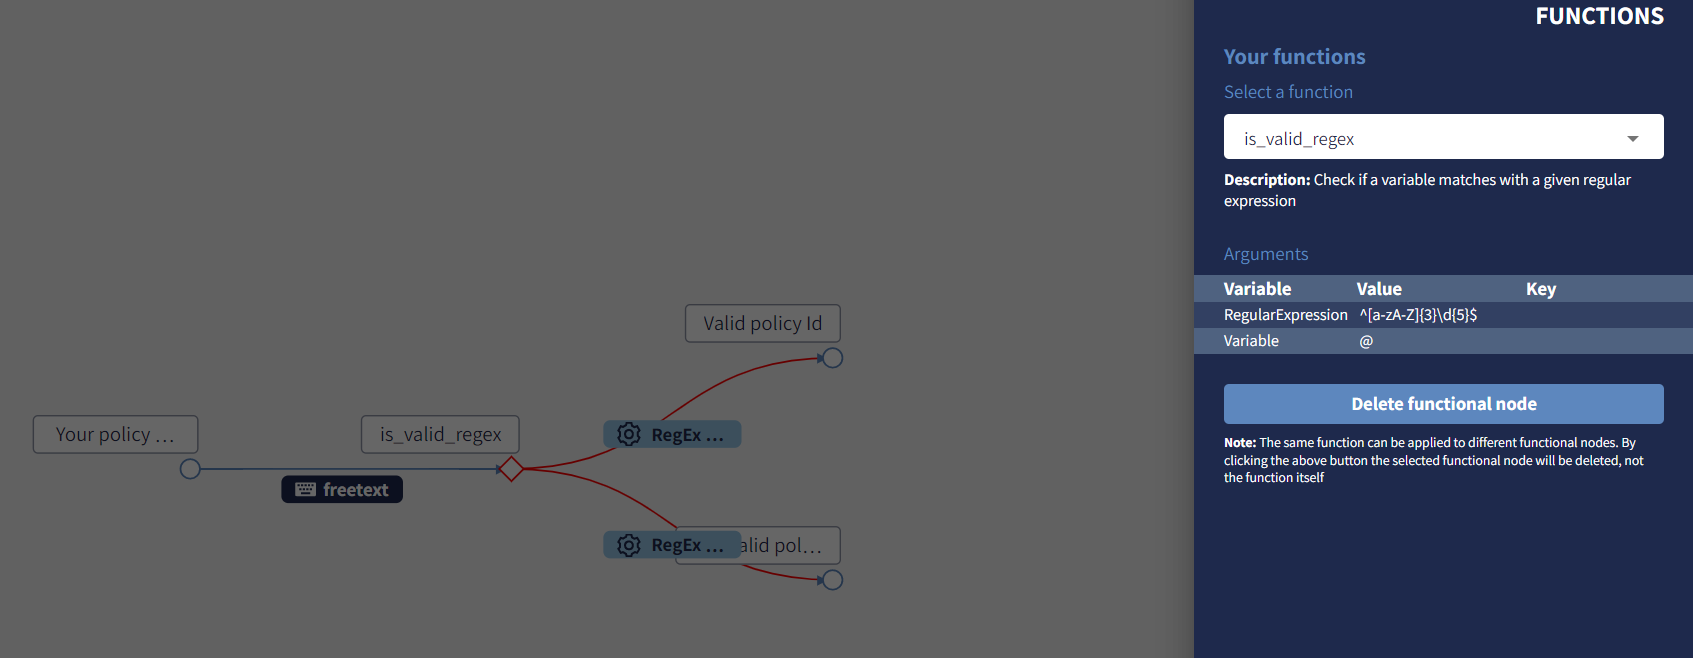
Examples of accepted policy Ids are PLC12345 and ABC00000, meanwhile TooManyLetters12345 or ABC1234567890 will be rejected.
Function send_email
A simple implementation of an email dispatcher procedure. This function comes useful when it's necessary to send a simple and quick email communication to the end-user, like a confirmation of login or to validate a request of authentication.
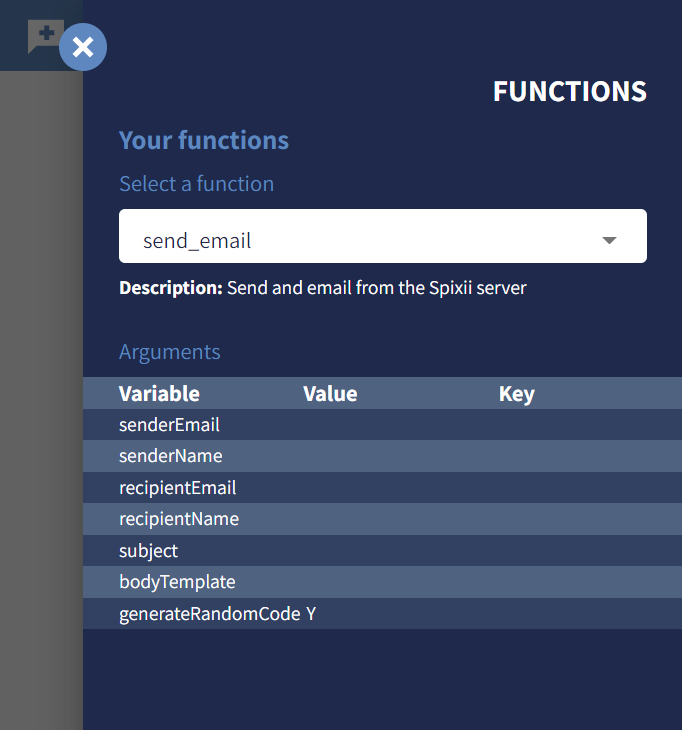
The send_email function parameters are:
senderEmail(mandatory): a valid email address of the sendersenderName(optional): name of the email sender (if not given, the sender email address will be used instead), max 265 charactersrecipientEmail(mandatory): a valid target email addressrecipientName(optional): name of the recipient (if not given, the recipient email address will be used instead), max 265 characters allowedsubject(mandatory): a text of max 265 characters that will be used as email subjectbodyTemplate(mandatory): the path of the HTML content of the email. For example,MailTemplate/LeadInsuranceLoginEmail.htmlgenerateRandomCode(default:Y): generates into the variable{{urand}}a 5-digits random code. This is particularly useful to authenticate the end-user with a 2-factors authentication through email address.
⚠️Important note: Note that this functionality allows to send only one email to one recipient. More advanced email functionalities can be built with a custom function. Also, for security concerns, the sender email address must be validated and approved by Spixii.
⚠️Important note:
The HTML template need to be uploaded into the server with the File Manager module.
Every {{var}} reference into the HTML content will be replaced with the value of the relative variable; in particular, a 2-factor HTML authentication template should contain the {{urand}} variable reference.
Custom Functions
Custom functions can be created using the Function Manager module.
When creating a new functional node, the option Create new function is available from the sidebar. When clicking the button, the function control panel will allow you to specify name and description for the new function.